The preparation of a Lytoceras ammonite from the Carixian of the Cher
When an ammonite arrives in our workshop, it is far from ready to be sold on our website or displayed. The specimen is received in its raw, unprepared state, still encased in its rocky matrix, which completely hides the details of the fossil. This initial, unrefined condition prevents one from fully appreciating the ammonite’s beauty and structure, which requires meticulous preparation to reveal its optimal form.
Our goal is to extract the fossil while preserving its integrity, carefully removing the surrounding rock layer by layer. This involves not only technical expertise to detach the rocky material but also careful attention to fragile areas that could be damaged during the process.
In this article, we will focus on the preparation process of an ammonite, highlighting the tools and essential steps required to transform a raw piece into a fossil ready to be displayed and admired.

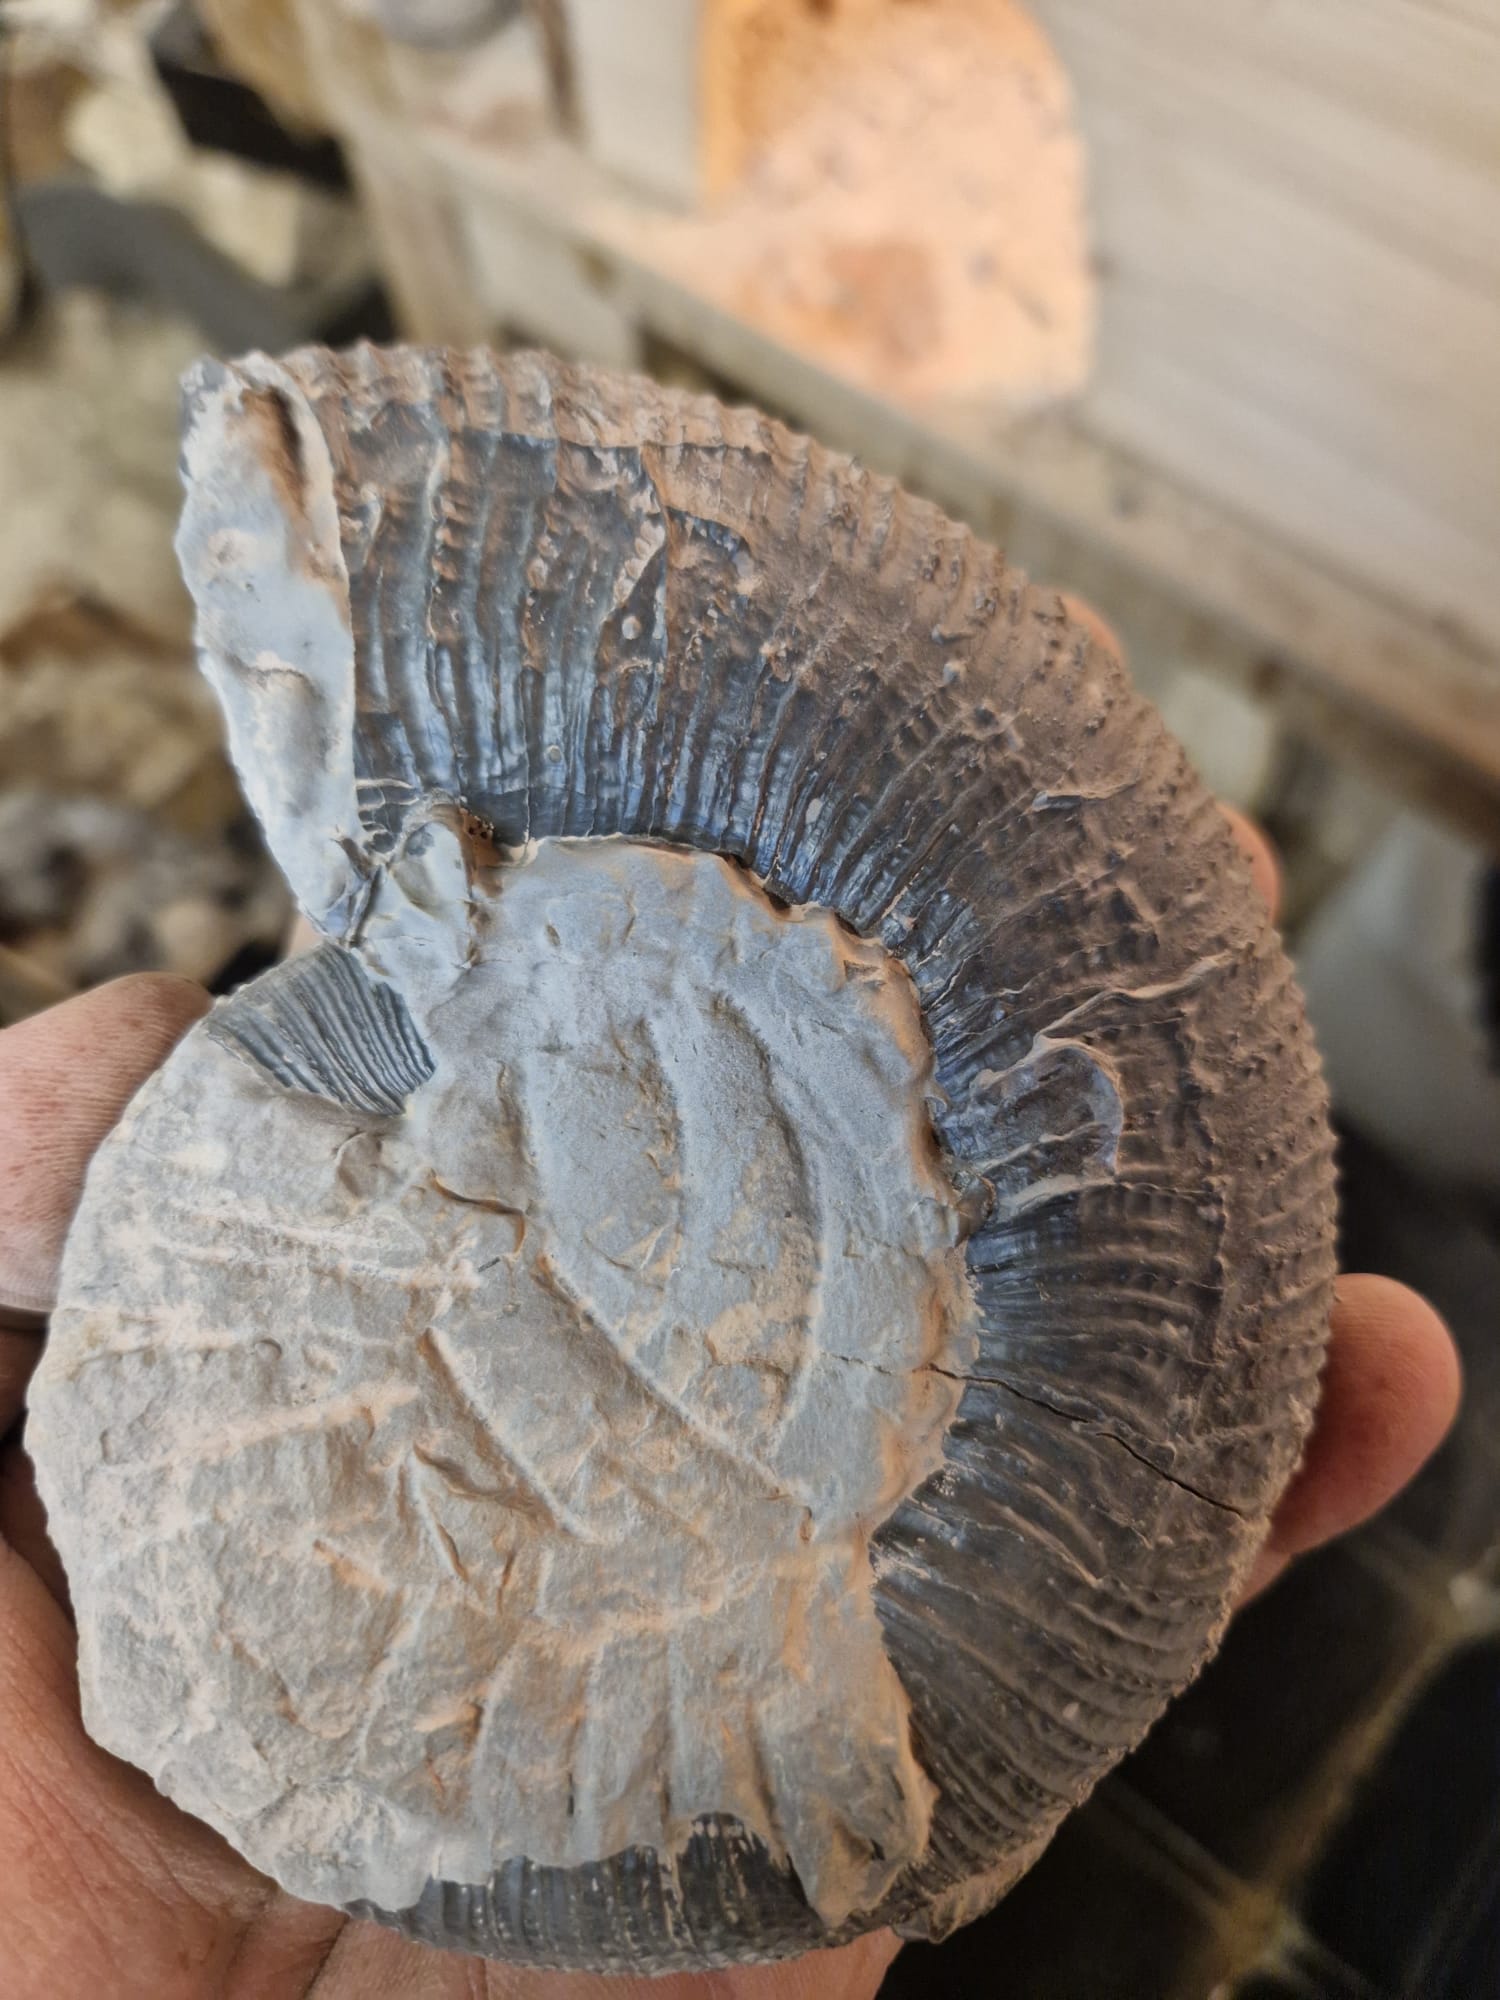
1. Initial Roughing-Out

The purpose of this first step is to remove the largest and most voluminous sections of the rocky matrix. This will reduce the amount of stone surrounding the fossil while ensuring a safe perimeter around it. As you can see in the attached photo, the largest sections of rock have been removed, revealing the shape of the ammonite.
This work must be carried out on both sides.
2. Using Pneumatic Hammer
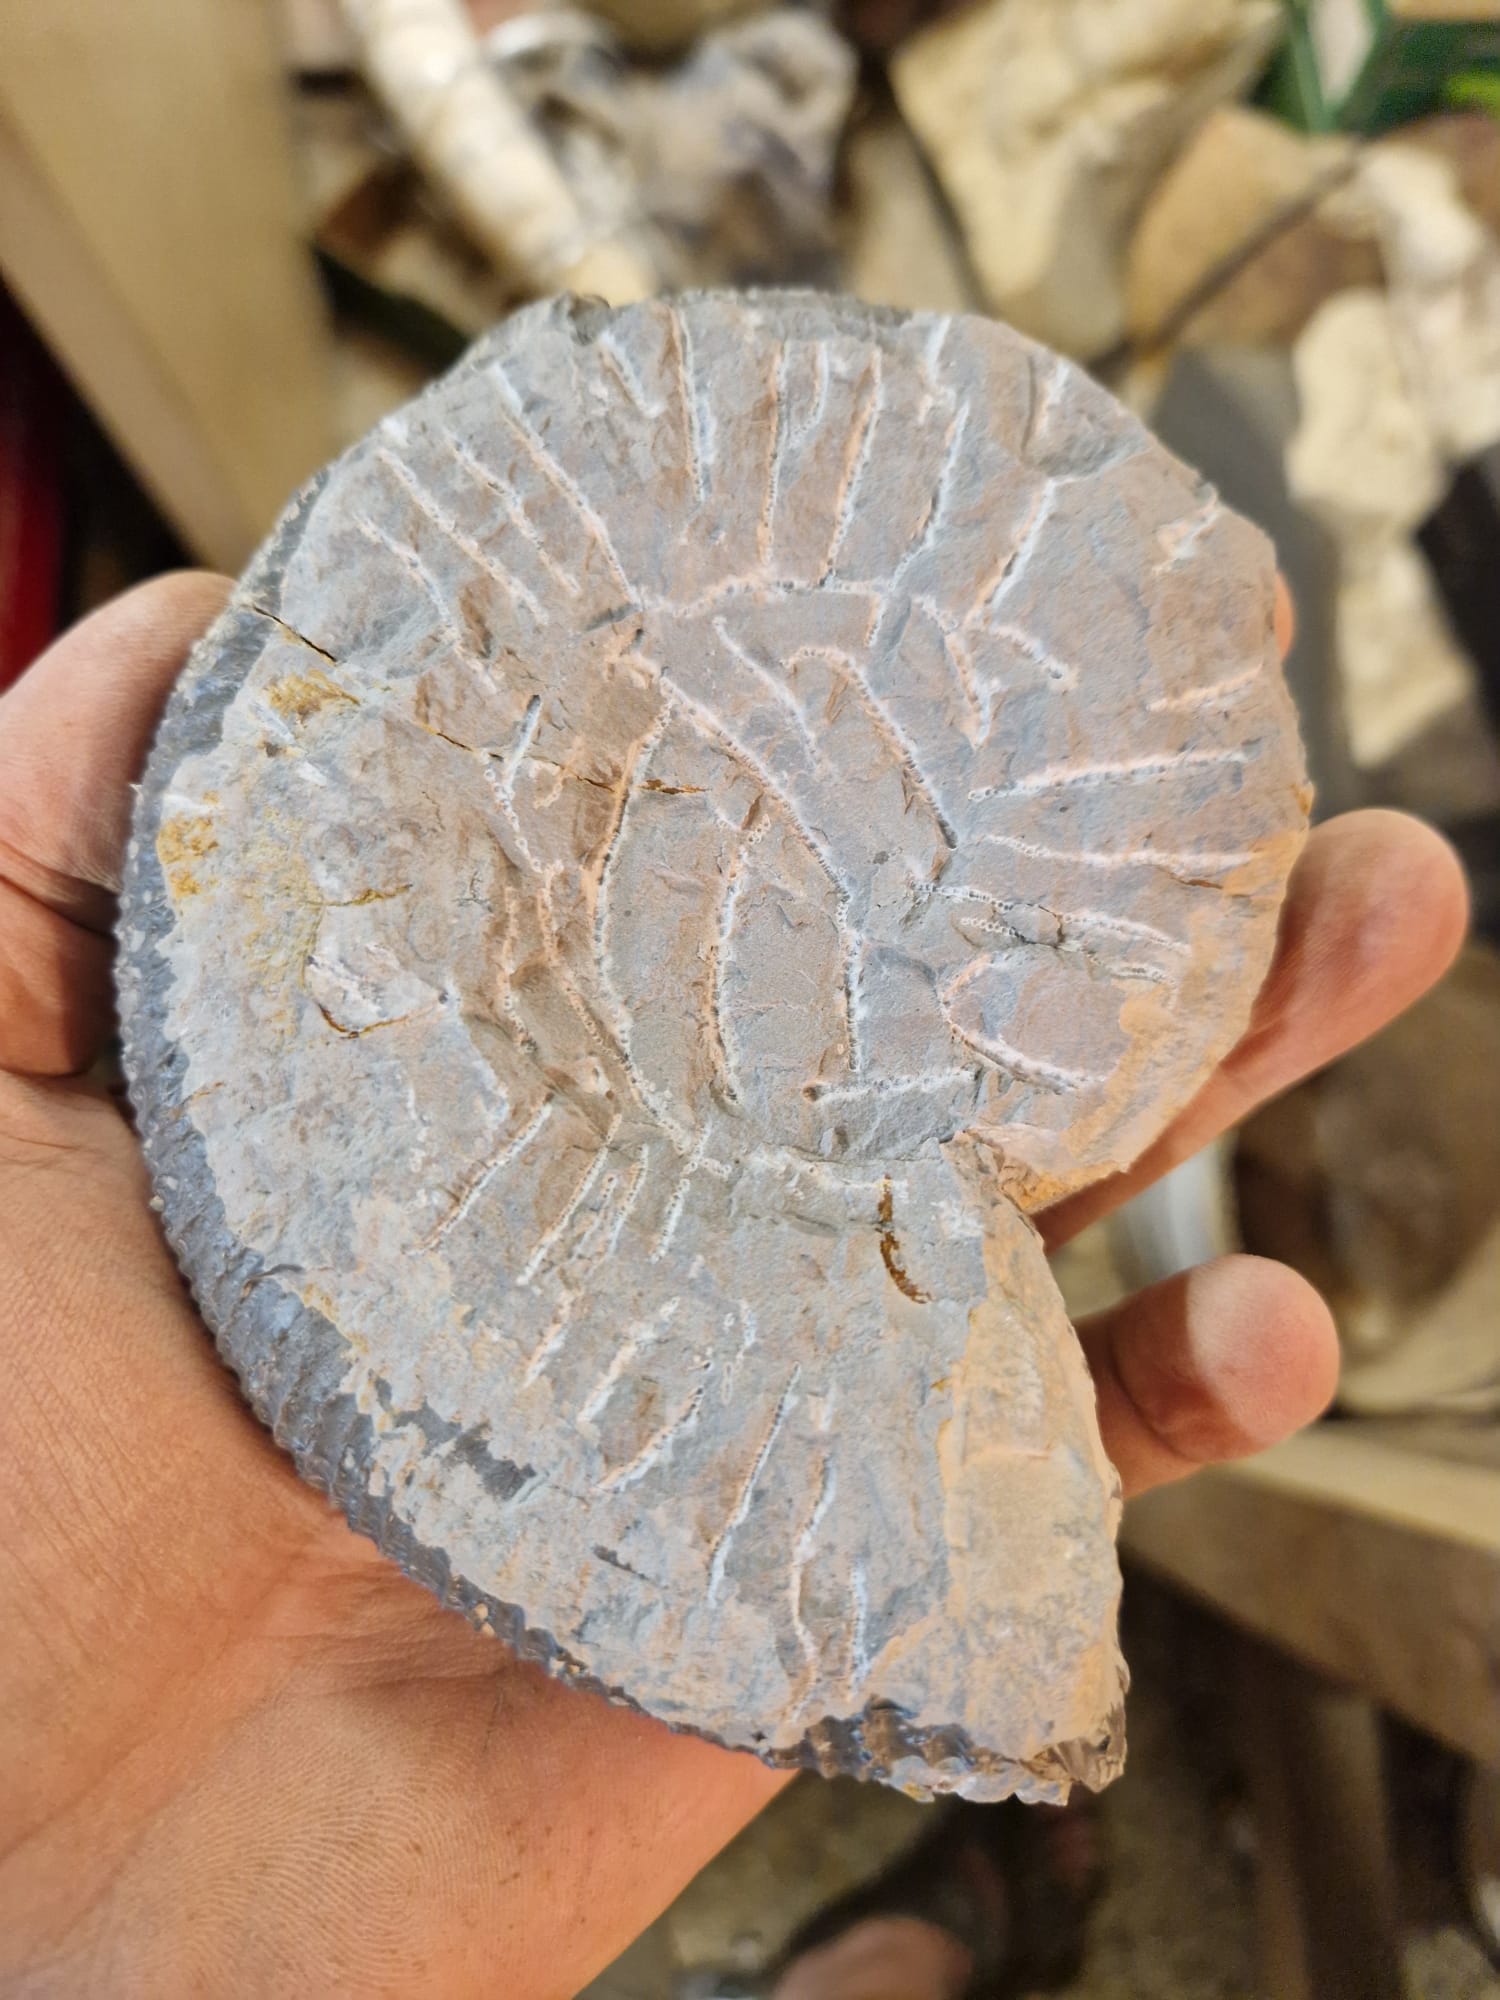
After the roughing-out, the work becomes more delicate. At this stage, we use a pneumatic percussion tool, which allows for finer removal of the stone without applying excessive pressure. The percussion tool is particularly useful for intricate areas where the rock is tightly bonded to the ammonite.
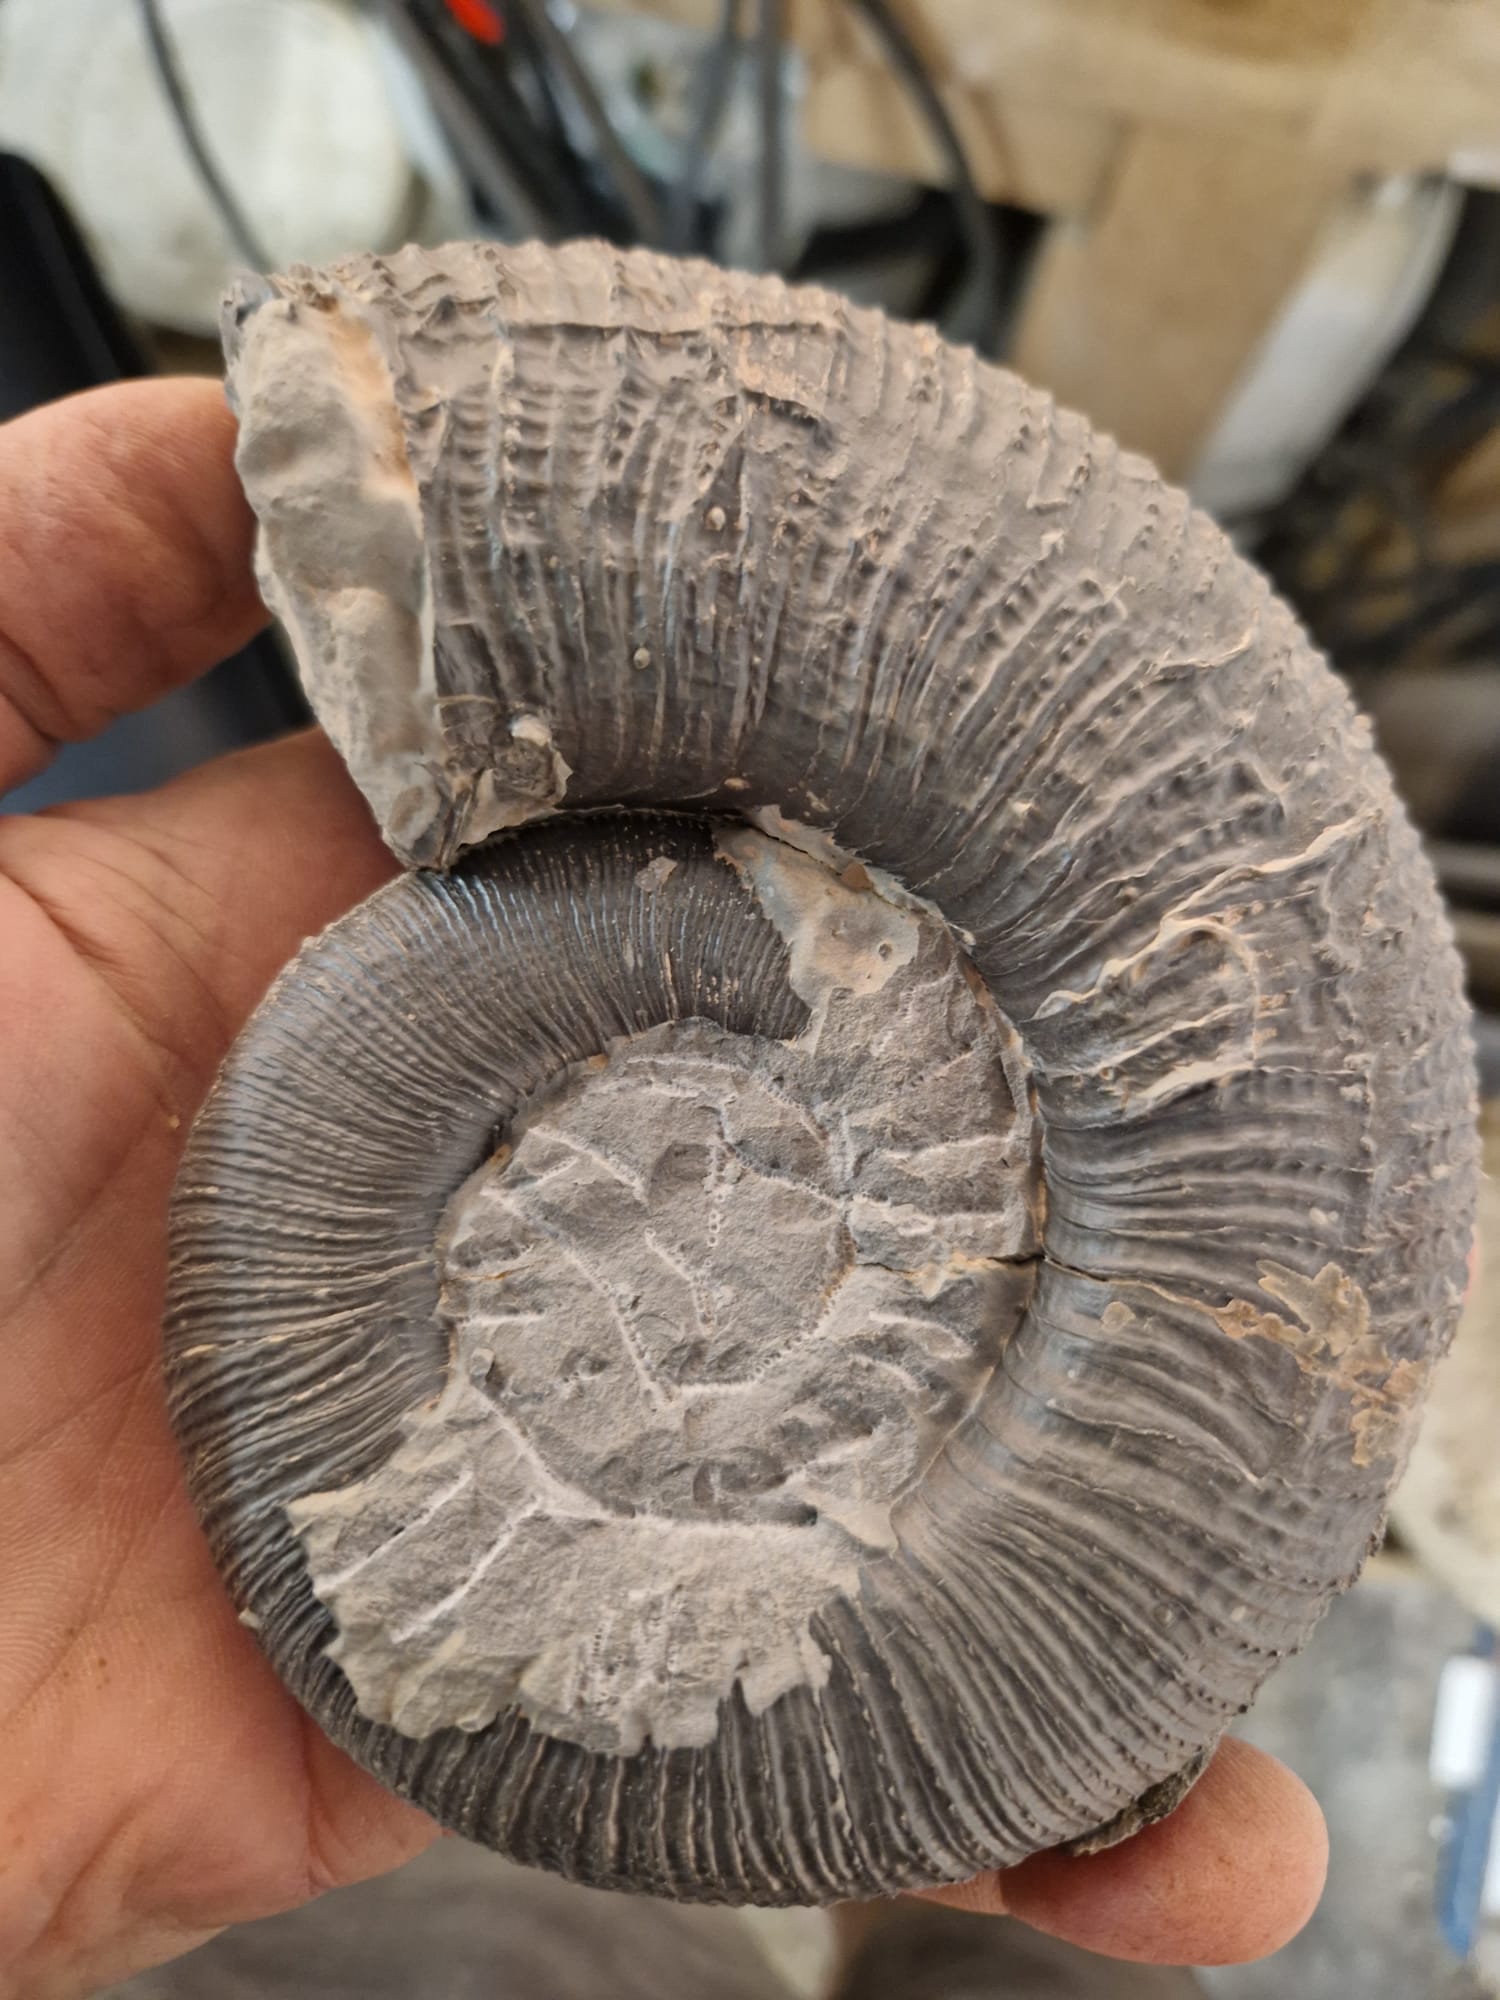
3. Sandblasting for Umbilicus Preparation

At Lithologia, the most used abrasive is iron filings. This product is ideal because it is hard enough to effectively remove the rock covering the ammonite, while being soft enough not to damage the surface of the fossil.
Same for the stomach and the other side.
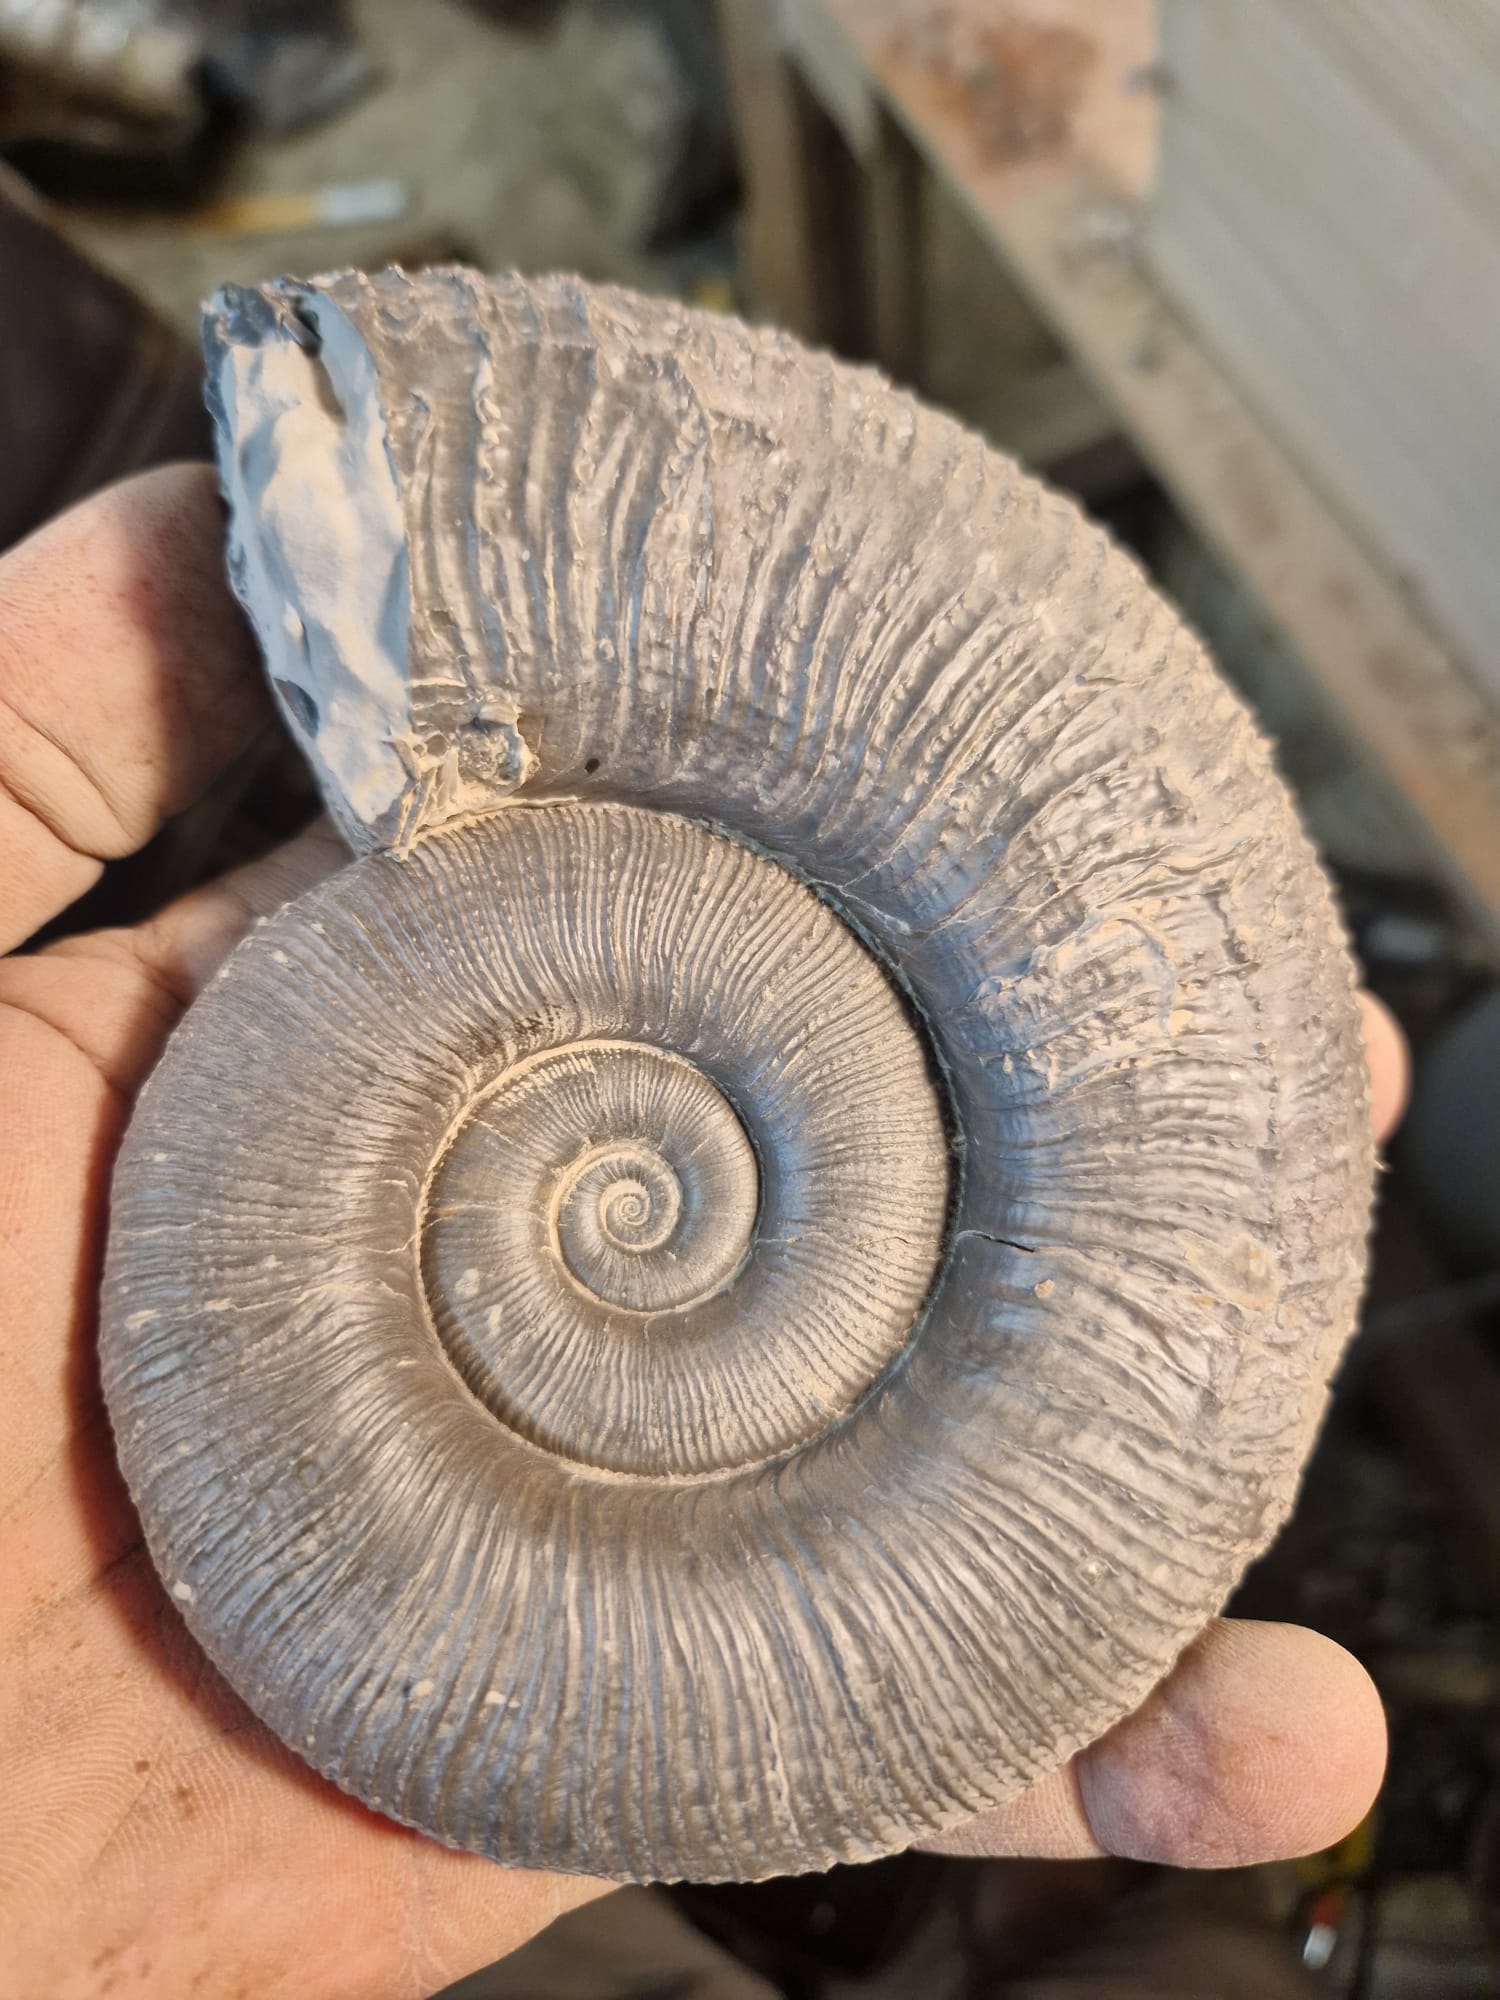
4. The final product
Here are two photos that will summarize the work done: before and after preparation.
BEFORE
AFTER


When the work is finished, we can finally sell the fossil. All that remains is to photograph it, create an ad and publish it online.
Tools used during preparation:
-Hammer and chisel
-Sandblaster
-Pneumatic hammer
-Scraper


